Easy Gluten-Free Wraps Recipe

Searching for ways to make delicious gluten-free wraps? You’ve found them! My recipe gives you perfectly pliable and foldable wraps ready for your favorite fillings or served alongside your favorite Mexican meals! They only take 4 ingredients and are naturally vegan.
One of the things I love most in this world is a good, authentic Mexican tortilla. Since becoming gluten-free, I’ve settled for less-than-perfect tortilla alternatives — until now that is!
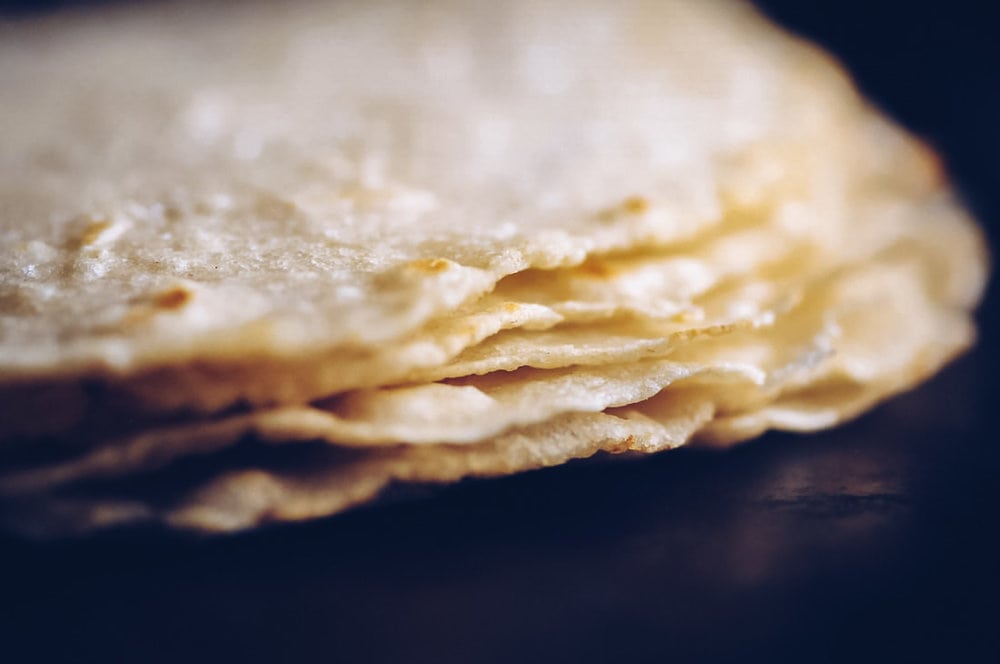
After much experimentation, I came up with these beauties! They are soft, pliable, tasty, healthy, super easy to make, heat well, store well — you name it! I am in LOVE.
If you’re looking for the perfect gluten-free vegan tortilla for your Mexican food needs or a wonderfully pliable and foldable gluten-free vegan wrap ready for your favorite fillings, this is it! I cannot wait for you to give it a go and tell me what you think!
Why You Will Love It
- Super easy to make! Once you find out just how simple it is to make homemade gluten-free tortilla wraps, you won’t go back to buying them from supermarkets or stores.
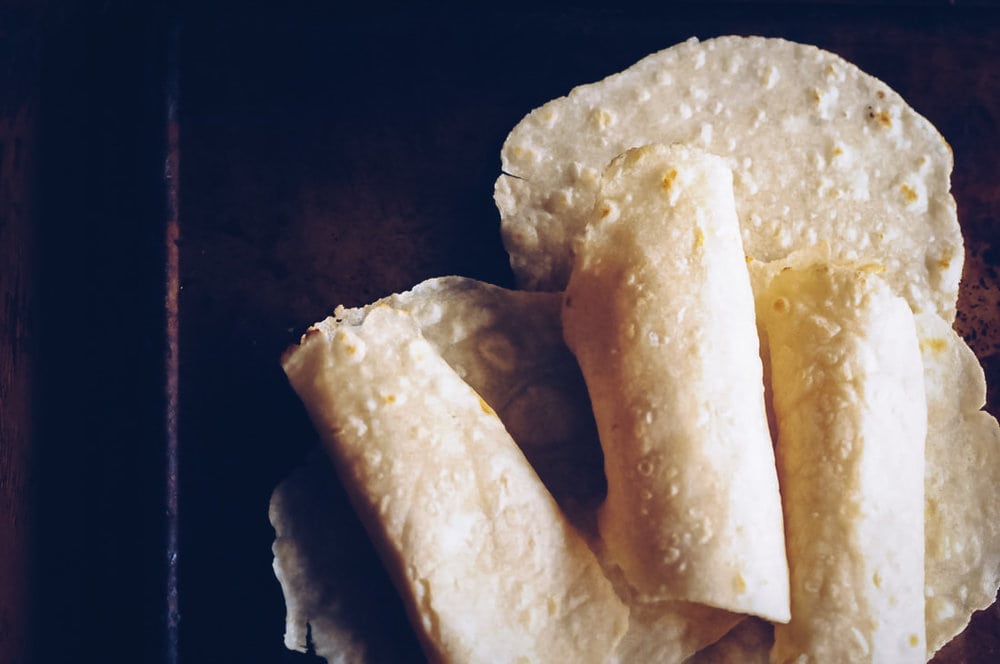
- In less than 30 minutes, you will have about 16 wraps, too, which is perfect for family and friends to share and enjoy together.
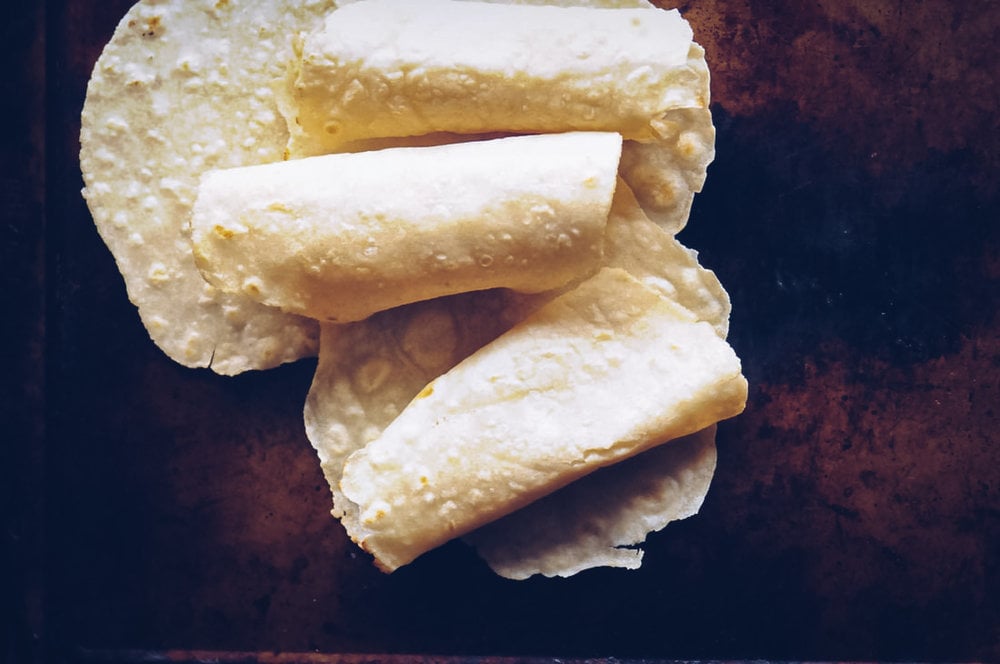
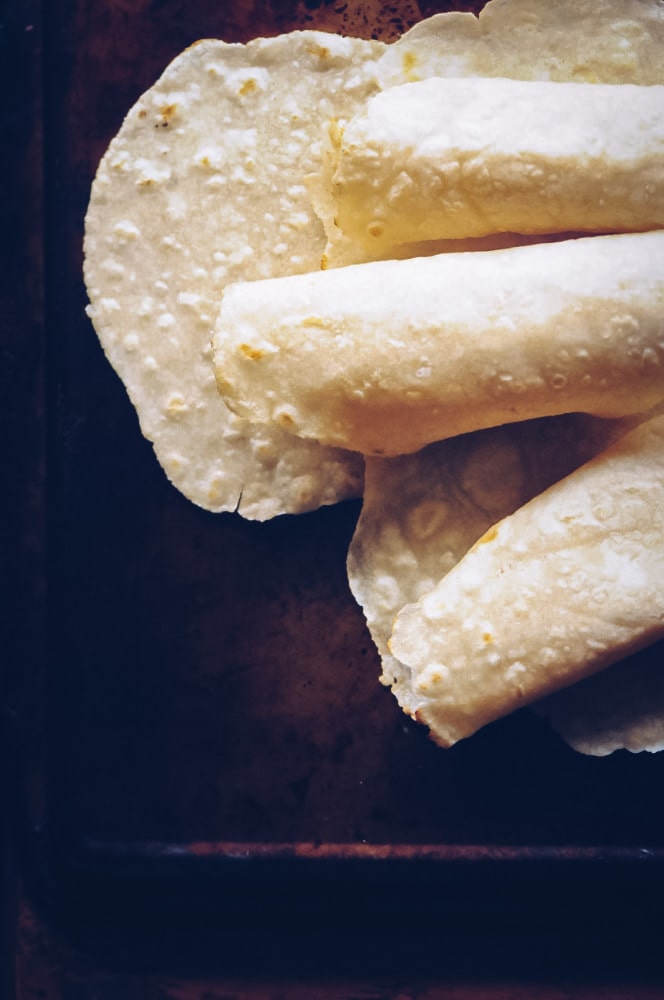
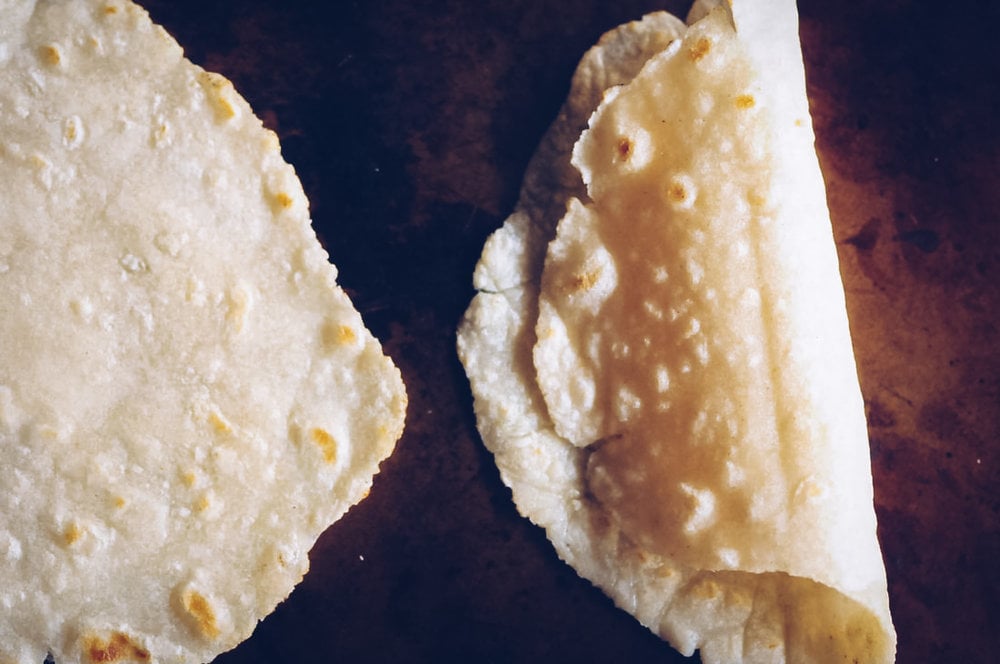
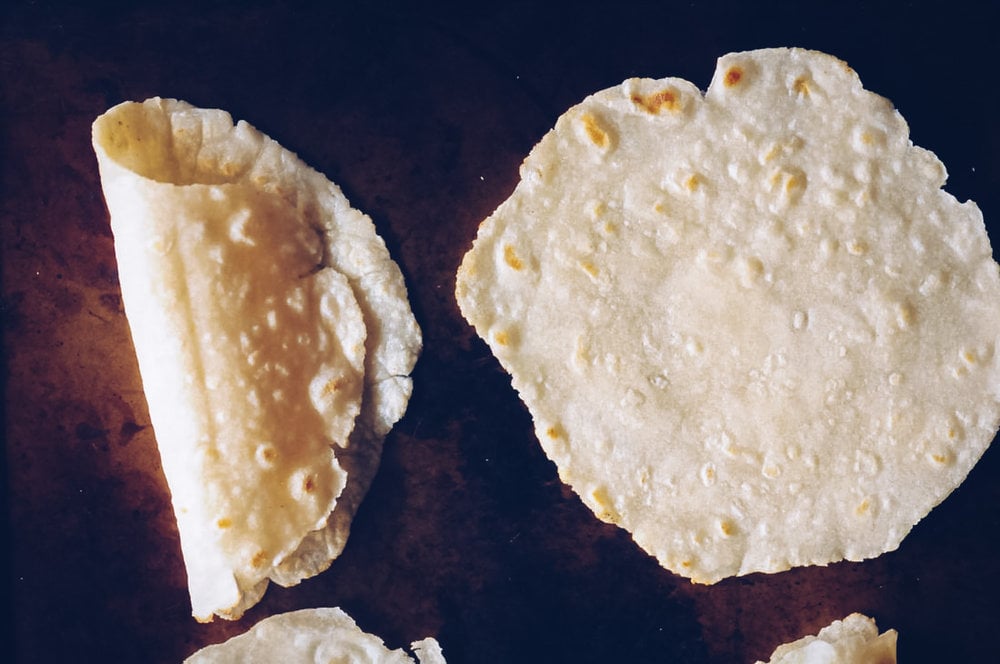
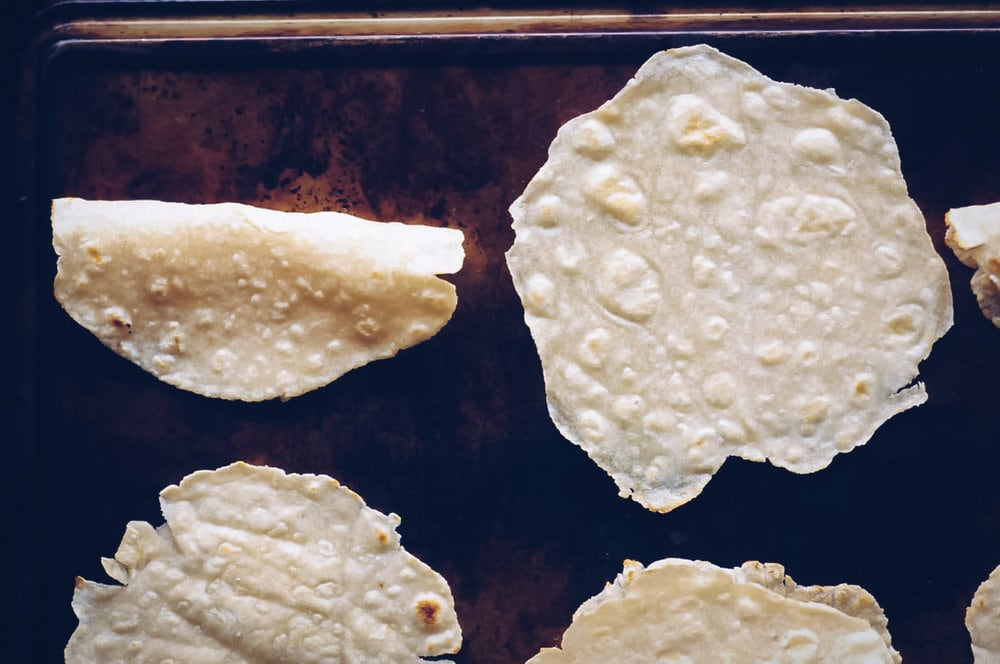
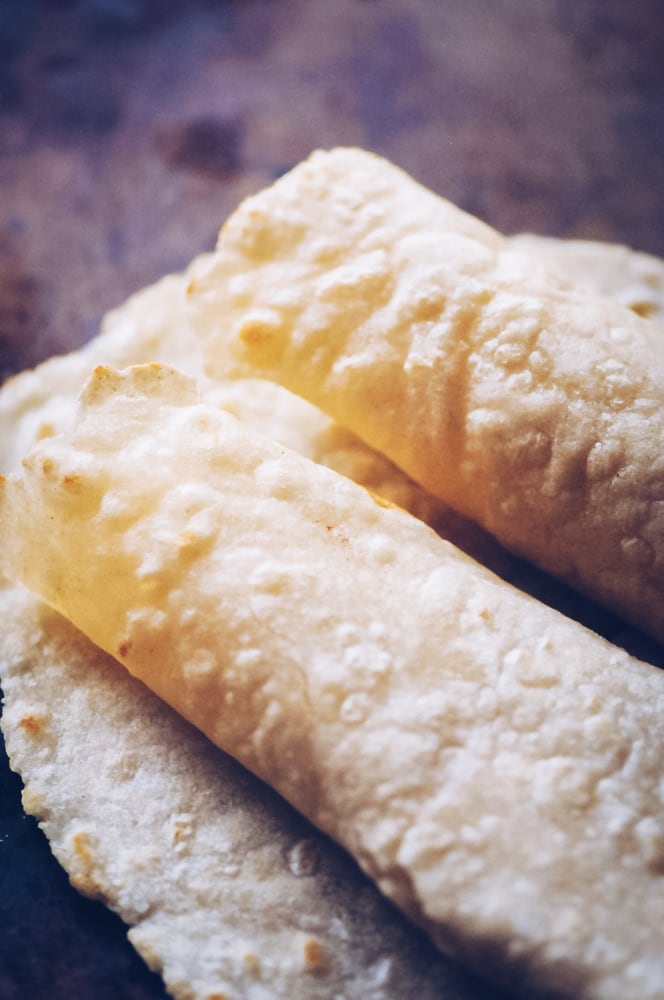
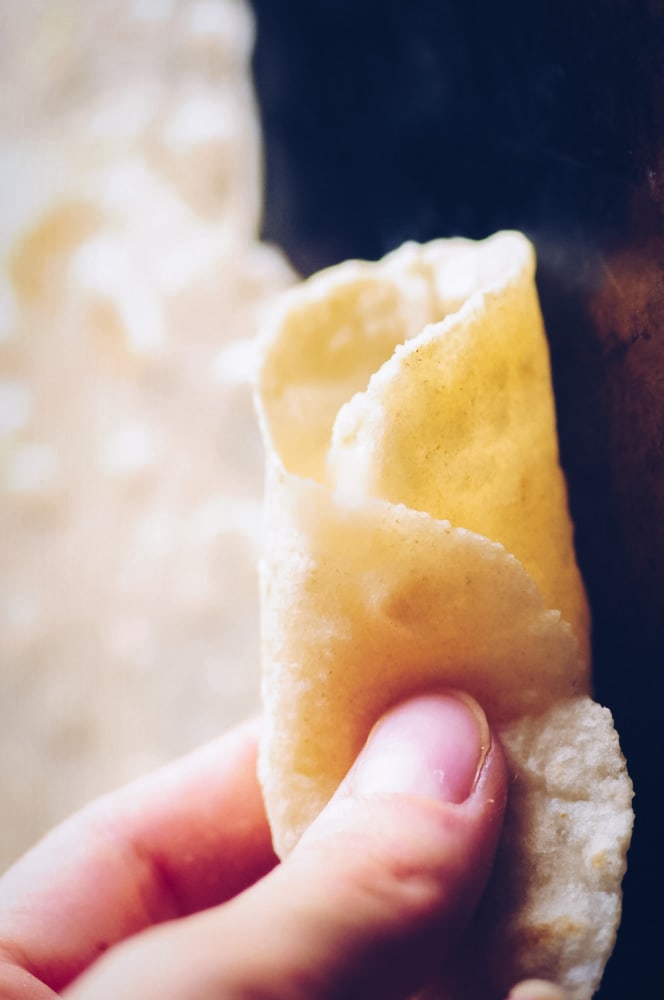
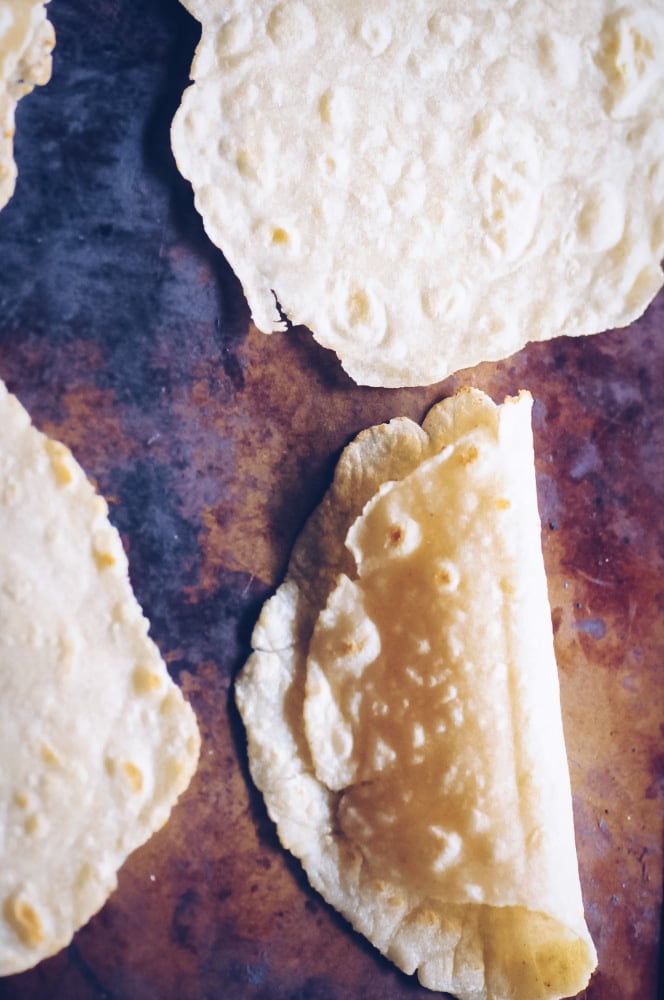
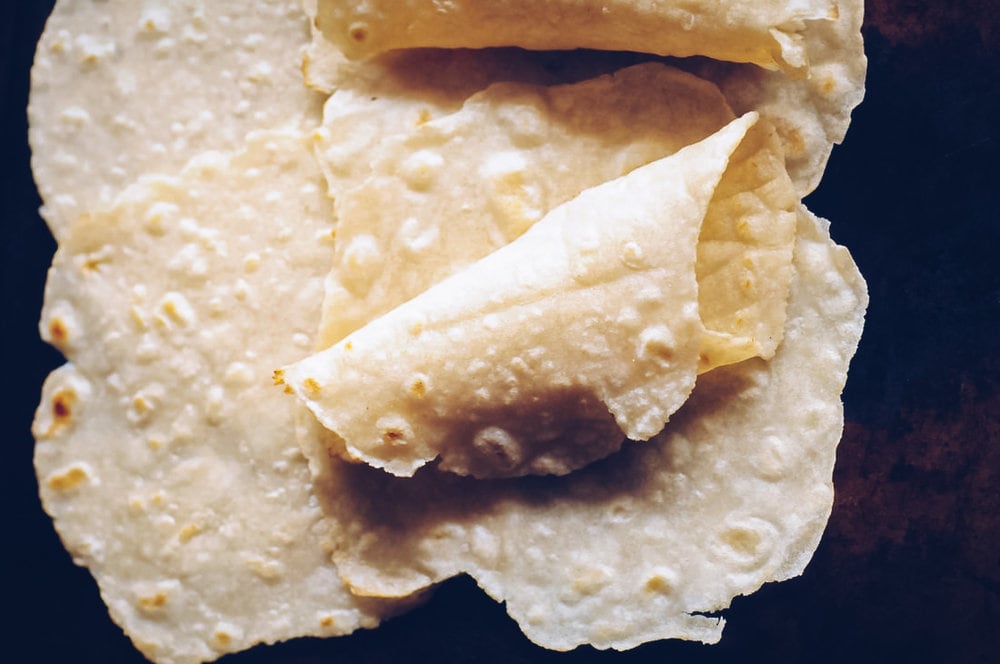
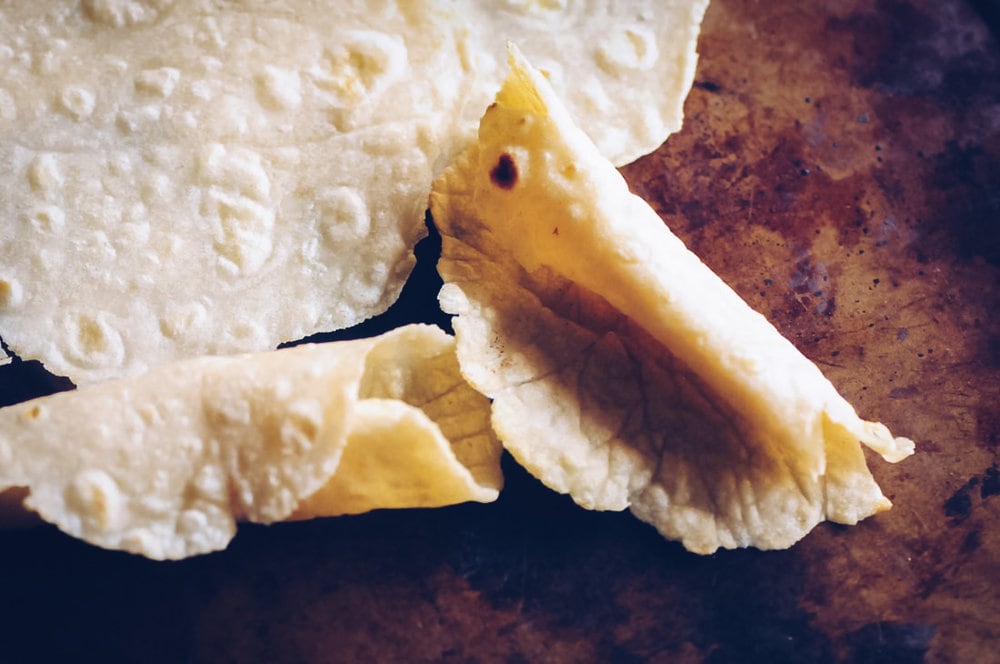
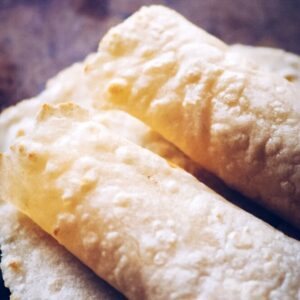
- Soft, pliable and foldable. You’ll just love filling it up with your favorite stuffing!
- Flavorful. They taste amazing on their own but will also complement whatever filling, spread, or topping that you choose to put in them. Yum!
- Stores well. Storing the leftovers is easy!
- Versatile. You can put your creative spin on these wraps to make them more enjoyable. Want to infuse them with leafy greens to make pretty spinach tortillas? Or give them an orange color by making lentil carrot tortillas? You can! You’ll also increase the nutrient content, so it’s a win-win.
- Naturally gluten-free, dairy-free, nut-free, soy-free and vegan. It’s perfect for everyone.
Ingredient Notes
- Hot Water: Allows you to mix the ingredients better, plus a hot water dough adds softness and pliability, sans gluten.
- Brown Rice Flour: Made from whole grain rice, this flour gives the tortilla wrap a nice, nutty flavor.
- Tapioca Flour: Has a mild starch profile.
- Olive Oil: Provides a bit of fat that can help make our wrap pliable.
- Sea Salt: Enhances the flavor of our gluten-free wraps.
How to Make Gluten-Free Wraps
- In a saucepan over high heat, add water and bring it to a boil. Once the water is boiling, turn off the heat.
- Add the remaining ingredients and stir vigorously until combined (it will look a tad crumbly at this stage, do not worry). Let it sit until it is cool enough to handle, taking about 7-8 minutes.
- On a parchment paper-lined cutting board or countertop, place your dough and knead until you can form one smooth round ball of dough.
- Divide the dough into approximately 16 rounded tablespoon portions. Form each into smooth dough balls.
- Heat a non-stick or cast iron skillet over medium heat.
- Dust your parchment paper with tapioca starch. Place one dough ball portion on the paper and then put a new sheet on top of the dough. Using a rolling pin, roll out the dough until you have one thin round tortilla shape.
- Carefully peel back the parchment paper and place your tortilla onto the hot skillet.
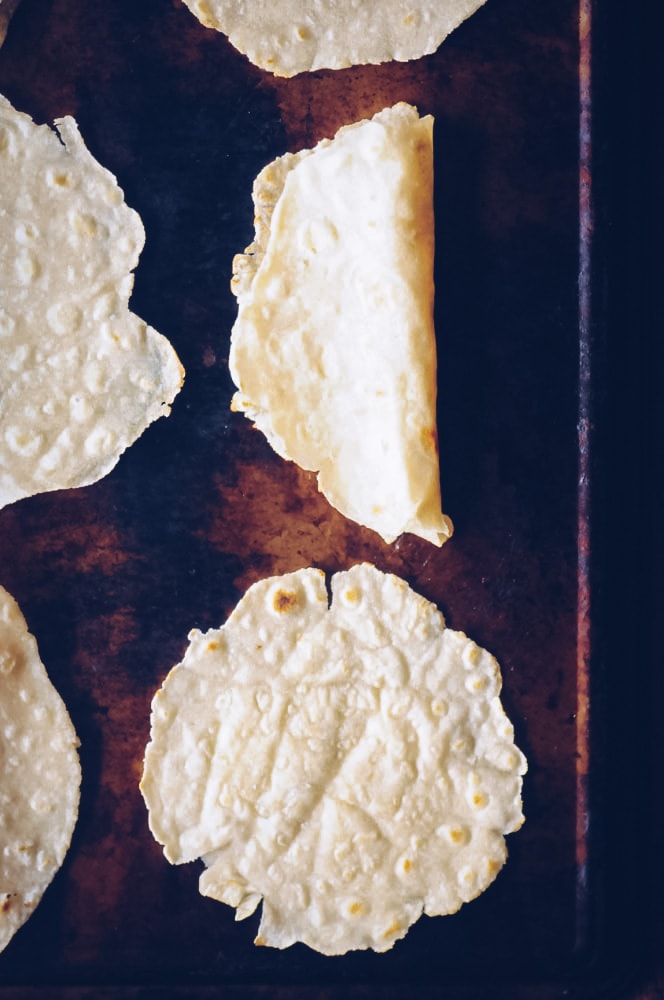
- Cook for 1-2 minutes, flip, and cook for 1-2 minutes longer until beginning to brown on each side. Repeat with all the remaining dough.
- Serve immediately.
- Enjoy!
Top Tips for Making Easy Gluten-Free Wraps
- Let the heated dough cool sufficiently before handling it (do not burn your hands!).
- I would suggest not substituting the flour for any other type, as I discovered this combination through much experimentation, and it produces the best result (pliable wraps!).
- Knead the dough thoroughly. The more you knead, the smoother the wrap dough will become and the easier it will be to work with.
- If you would like to make the wraps at a later time, you can prepare the dough balls ahead of time and store them in the refrigerator in an air-tight container for up to 4 days before cooking them.
- I highly suggest using the parchment paper method to roll out the dough. It reduces the stickiness factor and produces the best wraps.
- You can experiment with the heat level to produce the desired results. If you plan on using the wraps for cooked dishes like tortillas in quesadillas or the like, you might want to cook longer on higher heat for a slightly crispier result. If you intend on using them for wraps, cook on medium or even low heat for only about 1 minute on each side for the softest, most pliable results. It is a versatile recipe!
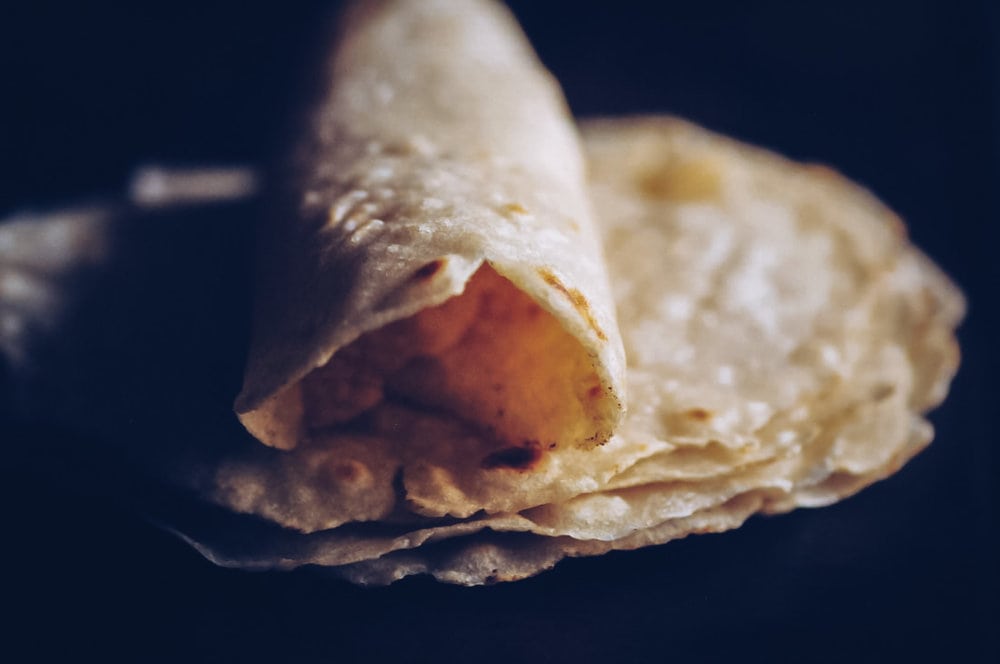
Serving Ideas
- On their own: Smear some butter or plant-based spread on the wrap and enjoy.
- Fill it with your favorite fillings: Make your own veggie wraps and enjoy a healthy meal anytime, anywhere. This Burrata Caprese Salad makes an excellent filling!
- For making burritos, soft tacos, or quesadillas: It’s perfect for making vegetarian burritos, soft veggie tacos, or cheesy delicious quesadillas.
- Personal thin-crust pizza: Place your favorite sauces, cheeses, and toppings and make a super crispy and enjoyable pizza!
- On the side of a delicious stew or curry: Use it like a naan to scoop up all the deliciousness of your favorite curry or stew recipe.
Storage
Any leftover tortillas can be stored by stacking them on top of each other and wrapping them in plastic wrap or aluminum foil. Then, place them inside an airtight container and store them in the refrigerator, where they can be used for up to four days.
You can also store them in the freezer. Simply place each wrap between squares of parchment paper and put them in a freezer bag. This way, they can be good for up to 6 months.
If using, simply remove the wraps from the freezer, cover them with a damp paper towel, then microwave until they’re thawed. You may need to set your microwave to defrost so the tortillas will thaw well.
Pair these wraps with cowboy caviar for one easy and truly flavorful meal.
You Might Also Love These Gluten-Free Recipes
Gluten-Free Wraps
Ingredients
- 2 cups water
- 2 cups brown rice flour
- 2 tbs tapioca flour
- 2 tbs olive avocado, or grapeseed oil
- 1/2 tsp sea salt
Instructions
- In a saucepan over high heat, add water and bring to boil. Once boiling turn off heat.
- Stir in remaining ingredients and stir vigorously until combined (it will look a tad crumbly at this stage, do not worry). Let sit until cool enough to handle; about 7-8 minutes.
- On a parchment paper lined cutting board or countertop place your dough and knead until you can form one smooth round ball of dough.
- Divide dough into approximately 16 rounded tablespoon portions. Form into smooth dough balls.
- Heat a non-stick or cast iron skillet over medium heat.
- Dust your parchment paper with tapioca starch. Place one dough ball portion on top and then place a new sheet of parchment paper on top of your dough. Using a rolling pin, roll out your dough in between your parchment paper sheets until you have one thin round tortilla shape.
- Carefully peel back the parchment paper and place your wrap into the hot skillet.
- Cook 1-2 minutes, flip, cook 1-2 minutes longer until beginning to brown on each side.Repeat with remaining dough.
- Serve right away, or keep wrapped in a tea towel for use the same day, or place in a covered container in the fridge for use up to 4 days, or freeze!
- Enjoy!
made these tonight, they turned out perfect, I used cast iron I think that’s the best way to make tortillas, I recently cannot have gluten or dairy because of my thyroid and allergy test, thank you so much for this, I will make all the time
I’m so happy to hear this! Thank you for sharing. 🙂
It was too sticky to even knead or roll. I had to keep adding flour or tapioca, and even tried oil. It was incredibly frustrating and ended up in our trash can!
I’m so sorry to hear you had a negative experience! This is usually a pretty foolproof recipe. Can I ask if you made any changes to the recipe? For instance, white rice flour or regular GF flour will not work in this recipe. Also, as stated in the tips, it will be sticky to start, but kneading it will actually take away the stickiness and if you do not like getting your hands into the mix, kneading through parchment paper works well, too. I hope you have a better experience if you decide to try again!
Made these tonight and was pleasantly surprised!! These were delicious!
I’m so happy to hear that! Thank you for sharing. 🙂
Awesome recipe! I am GF and DF and have found it hard to find wraps which are both AND can be frozen. I have already made this recipe 2 times for last 2 days. My husband loved having it warm. I have made a batch and frozen it. Would you please tell me how to thaw or warm it again to put the fillings in it to make a wrap.
Hi Nandam – I’m so happy to hear that! Thank you for taking the time to share. 🙂 You can actually skip thawing and actually place a frozen wrap in a pan over medium low heat, flipping occasionally until thawed and then you can use as is for a wrap or continue to cook if you’re making a quesadilla or a warm wrap or the like. If you would prefer thawing, you can do that too, in which case I recommend placing it in the fridge to thaw overnight. I hope this helps!
LOVE these! Best in the world is true! They come out perfect for me every time! What a treat! I use them in a great recipe for egg roll-ups by Nadiya. And I use them for fish tacos! Thank you!!!!
Oh, this makes me so happy to hear! Thank you for sharing!! 🙂
THESE TOTALLY WORKED. I didn’t add any oil or salt and instead of 16 small balls I did eight to have bigger ones for bean burritos. My little guy ate them right up! Thank you!
Nothing makes me happier than receiving a comment like this! Thank you for taking the time to share! I appreciate it. 🙂
Hello,
Thank you so much for this wonderful recipe. I left out the oil because my doctor has me on an oil free diet and they still came out terrific! Question, you mentioned you can freeze the dough balls, but I want to know if you can roll them out ahead of time and refrigerate OR freeze them? will they still have the beautiful texture and pliability? I thank you in advance for answering my questions.
I’m so happy to hear that! Thank you for sharing. Yes, you can most certainly do that. Just make sure you stack them with sheets of parchment or wax paper in-between. 🙂
These sound great! I have all the ingredients! Just wondering if potato starch or corn starch would also work in place of the tapioca starch.
Hi, Anita! I haven’t tested it, but from experience, those usually work well as a replacement in 90% of situations. Arrowroot also makes a great alternative to tapioca. Good luck! I hope you enjoy the recipe. 🙂
Hi I cannot do rice flour… any suggestions for an alternative nut free grain free flour?
My flour options are coconut, chickpea, and cassava but thats iffy for me.
Hi! How are you with sorghum flour? I know some of those on a grain-free diet are sensitive to it and some are not. It is most like brown rice flour, in my opinion. Second to that, cassava flour can make some excellent grain-free tortillas. I have a good blogger friend over at Calm Eats that has a lovely grain-free tortilla recipe here: https://calmeats.com/paleo-tortillas/. I hope this helps! 🙂
Hello,
I was so excited to make these tortillas, as I’m on a restrictive elimination diet and can finally have the tapioca flour. However, I, too, followed the directions exactly (I’m an experienced baker), and, even after adding about a cup more of the store-bought rice flour, it’s far too loose and wet to make into a ball. I guess I’ll keep adding more rice flour and have 500 tortillas, like Sun had.
Thank you,
Jen
Hi Jen,
I’m so sorry to hear that! I’ve had trouble replicating this issue. Do you mind sharing with us what flour brand you used?
Thank you,
Kristen
HI Kristen,
Thank you for replying! I used Arrowhead Mills Rice Flour. Sadly, I couldn’t use the dough at all: no matter how careful I was, it would fall apart when I tired to peel it off of the parchment paper.
Any suggestions?
Regards,
Jen
Hi Jen – that is really odd. The boiling step usually eliminates any chance of it being too wet. It usually absorbs rather quickly and is more on the dry side rather than wet. Hmm. I would suggest halving the recipe and giving that a go, kneading it as much as possible before rolling, and if all else fails, I would suggest trying a different brand of brown rice flour (I like Bob’s Red Mill). I’m sorry you’ve had this experience, and I do hope it works out for you if you try it again!
Nice job! This recipe came together quickly and worked out perfectly. The tortillas taste great, they’re pliable but not doughy, and I’m glad this made a batch of 16 because I ate three of them while standing over the stove cause they were so fast and yummy. At least there are some left for the rest of the family for dinner (even if I’m too full to eat now). Thanks for sharing this!
I’m so happy to hear that!!! Thank you for sharing. 🙂
Made it to the recipe and it worked out perfectly.. just wondering if you can freeze the dough so you can make them fresh next time.. there is only 2 of us to feed but a family of 4 would need this normal quantity. Thanks for this recipe it’s worth the 20mins to make them..
Hi Kelly – I’m so happy to hear it worked out for you! Yes, you can freeze them. I like to roll them into balls, place the dough balls on a cookie sheet in the freezer until frozen then store them in bags in the freezer. Then you can just set out to thaw prior to rolling out, usually around 1 hour or so. Alternatively, you can also halve this recipe for smaller portions! I hope this helps. – Kristen
Actually I put the whole left overs in one solid ball in the freezer. it was dry when I pulled it out of the freezer so I put it in a food processor and added a little hot water to bring it all back together and make it workable. Worked perfectly
That’s a great idea! I’m so happy it worked out for you. Thank you for sharing. 🙂
Hi, I made a half recipe tonight, fabulous. Simple, amazingly quick and I had the ingredients in my pantry. Thumbs up, thank you
Hi Denise – I am so happy to hear that! Thank you for sharing. 🙂
I think there is a typo. I added one cup of water and it was great. Two would have been soup.
Hi Elizabeth – Hmm, there isn’t a typo. It’s definitely a 1:1 ratio for the water and flour. I’m wondering..did you boil the water? Because if that step is skipped, the water would definitely yield different results. I’m still happy you were able to enjoy it though! 🙂
I made this and the dough was extremely wet and sticky.( I think it was because I made homemade brown rice flour )
But I didn’t want to make anymore, so I added A gluten free flour blend that I had (first two ingredients was rice flour) and added until it became a nice dough.
This came out very good and much better than expected ?
now I have like 500 tortillas because of how much dough I made haha.
Thank you for sharing! Yes, the dough shouldn’t be that wet. I haven’t tested it with a homemade rice flour before. I appreciate you sharing your experience, and I’m glad it turned out! 🙂